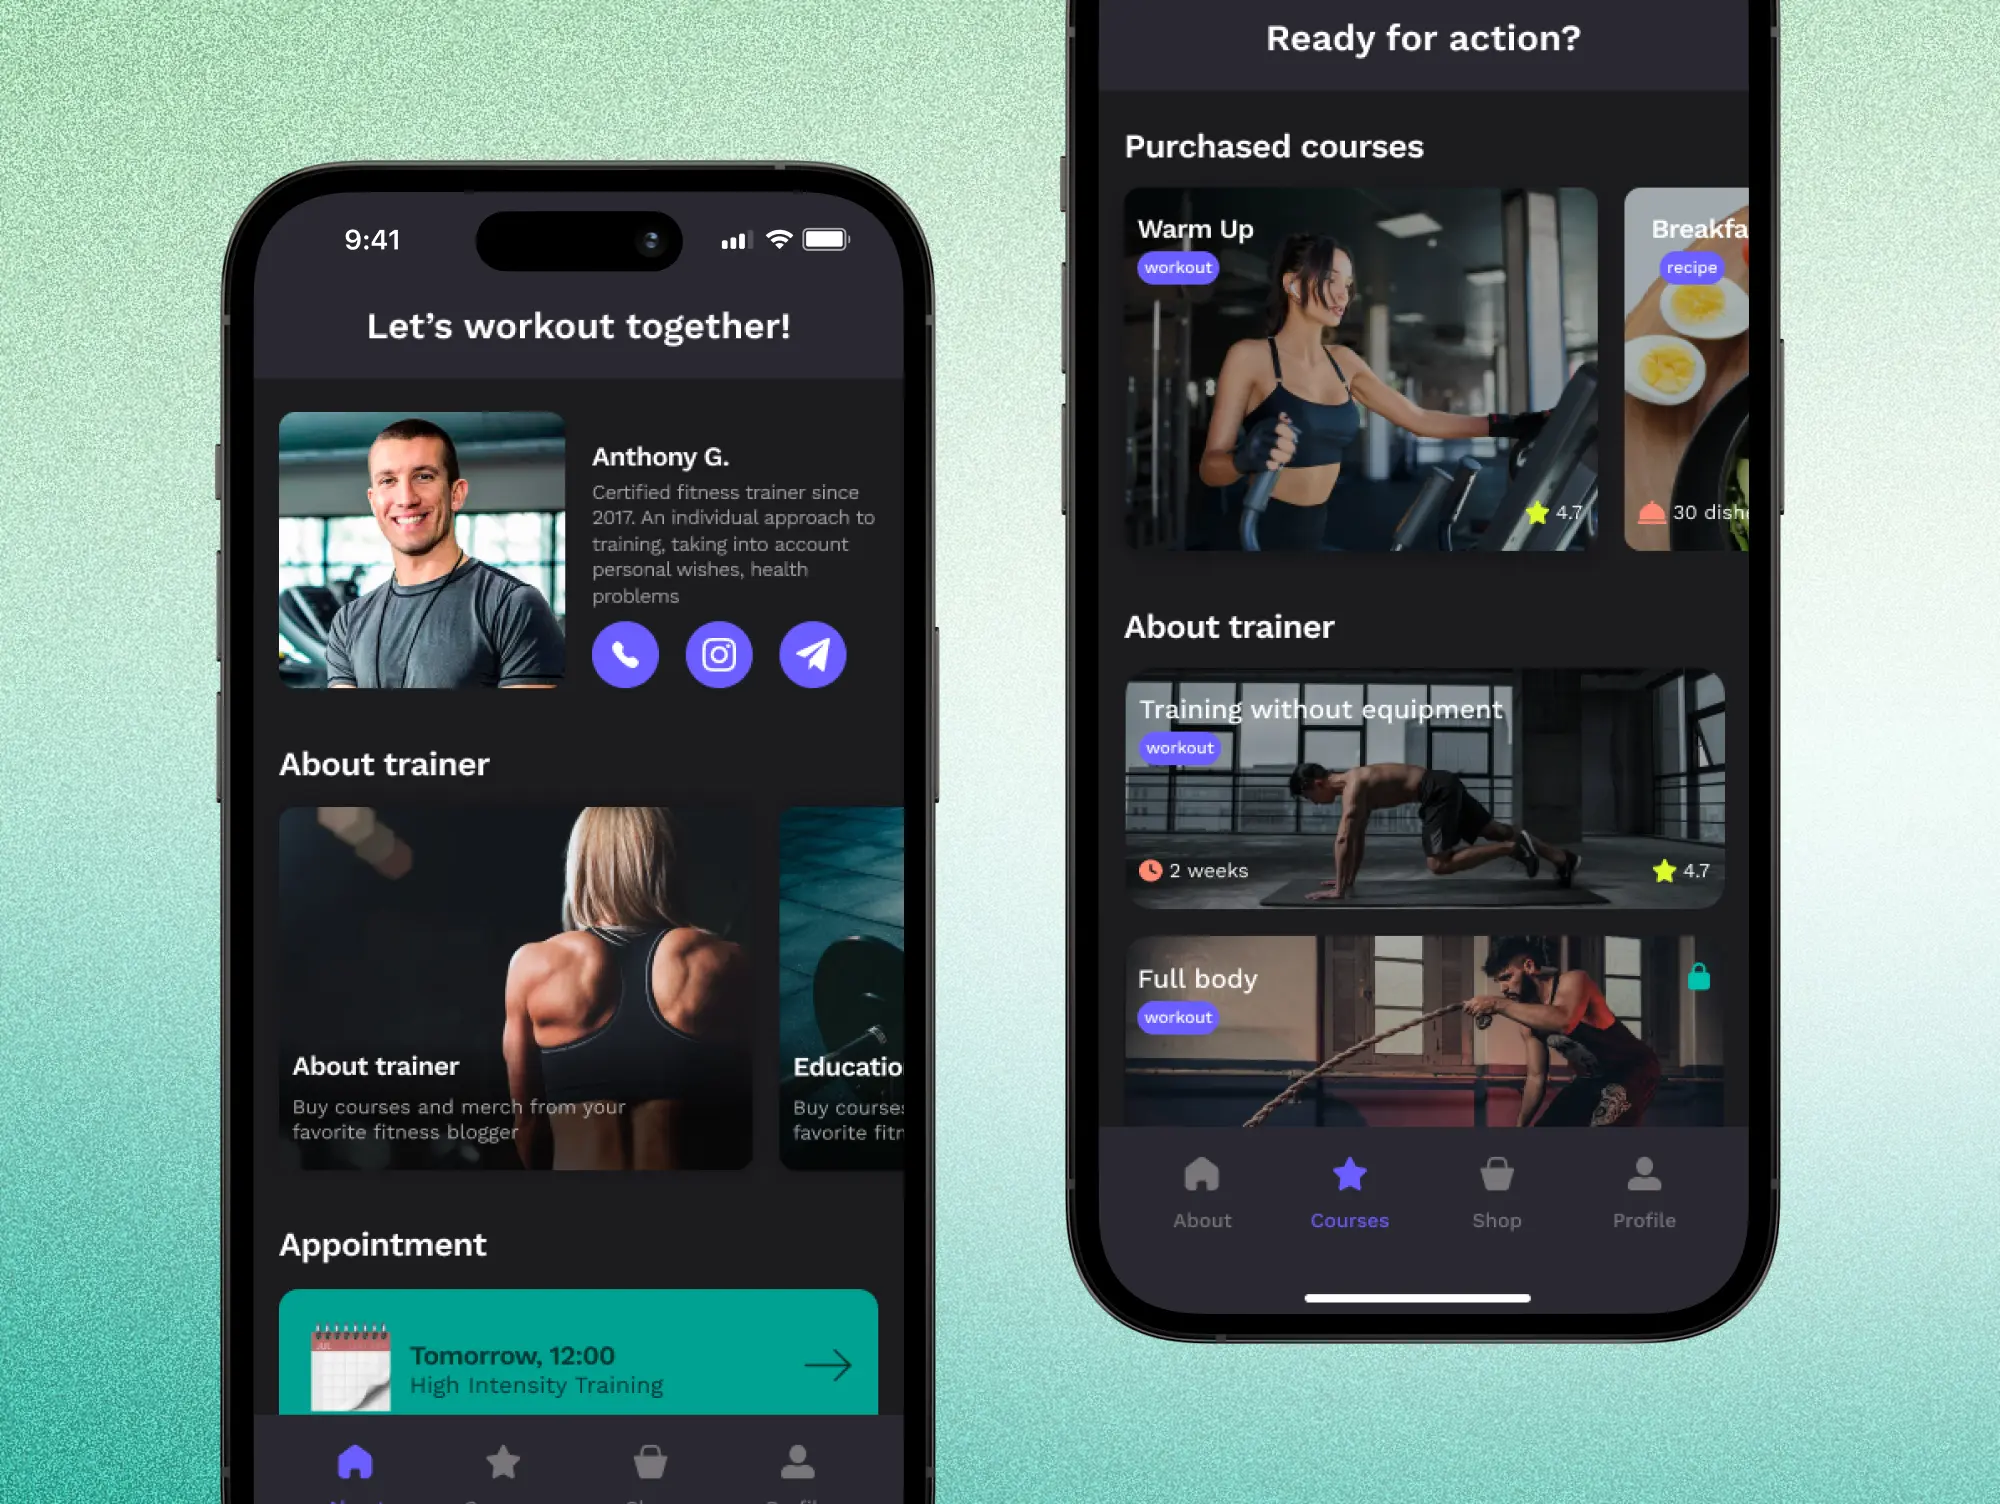
In the dynamic world of app development, creating a seamless and user-friendly application requires a well-structured design process. What the Flutter specializes in developing cutting-edge applications, and in this article we will analyze all the steps of What the Flutter's design process using the example of the Blogfit app case.
Starting with the Initial Client Conversations, where team lays the foundation based on client needs, ensuring that the project's vision is clear. This sets the groundwork for Wireframing, a phase that visualizes the app's architecture, enabling clear communication between client and designer. Visual Styling infuses the design with brand personality and emotional resonance, creating an engaging visual identity for the app. The Interactive Prototyping phase takes these designs and gives them life, allowing stakeholders a tangible feel of the final product. Once the vision is perfected, Final Handover ensures a seamless transition to the development phase. Each stage, as described, underscores the company's commitment to crafting mobile apps that are not only aesthetically pleasing but also resonate profoundly with brand values and user expectations.
Initiating First Client Call
The initial call with a prospective client is a crucial step in the journey towards creating a meaningful and functional app design. It's the phase where the business development team steps in.
The primary objective of this call is to gather as much information as possible regarding the client's requirements and desires. To make this process streamlined and efficient, we employ the '5Ws' system - Who, What, When, Where, Why. This approach ensures that we don’t miss out on any critical aspect that needs to be considered for the app design.
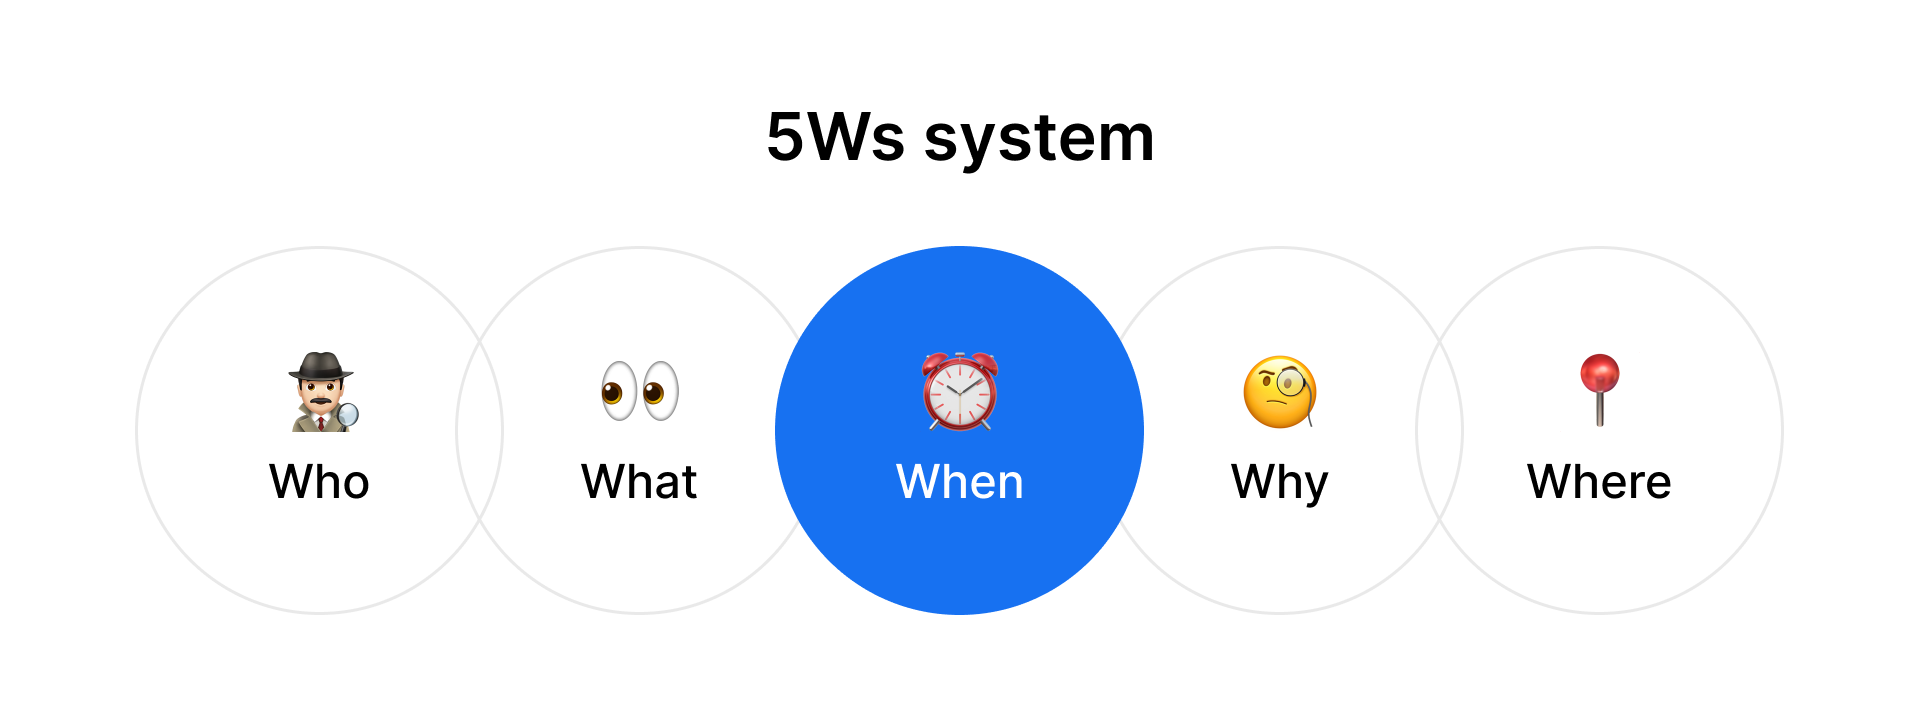
- Who: Identifying the target users of the app. Who is it being built for? Understanding the target audience is crucial for tailoring the design and functionalities of the app.
- What: Understanding what the client wants to achieve with the app. What are the main functionalities and features that need to be included?
- When: Establishing a timeline for the project. When does the client expect the app to be completed? Are there any critical milestones or deadlines that need to be met?
- Where: This refers to the platforms on which the app will be available.
- Why: Understanding the underlying business problem that the app is intended to solve. This is a critical aspect because it influences the entire design and development process.
Remember, the ultimate goal of this process is to understand the business problem thoroughly. Only by fully comprehending the client’s needs and the problem they are trying to solve can we design an app that not only meets but exceeds their expectations.
Gathering Requirements
Understanding the client's needs is a crucial first step in any design process. This stage involves the business developer collecting and documenting any references that the client likes or prefers. These references could be related to style, features, or any other specific aspect the client wants to include or emphasize in the design.
The requirements can be collected in several ways, depending on what was previously agreed upon with the client. It could be during a second call or via email. If a second call is scheduled specifically for gathering requirements, it is advisable to conduct this call with the designer present. This ensures that the designer can ask questions or seek clarifications directly from the client, leading to a more comprehensive understanding of the requirements.
After the call, the collected information serves as a guide for the design and development teams to commence work on the app. It is essential to have a well-defined and detailed requirements document that can serve as a reference point throughout the project. To make this task easier, we offer a free template with questions for stakeholders that can help in collecting and organizing the requirements in a systematic manner.
Remember, a successful design project starts with a thorough understanding of the client's needs and preferences. Therefore, it is crucial to take the time to gather and document all necessary requirements at the beginning of the process.
Building User-flow
Every product or feature that we ideate and create is based on the insights and feedback we receive from our stakeholders. After gathering feedback and requirements from stakeholders, our design team gets down to the business of compiling a feature list. This list isn't merely a wishlist but rather a structured list of functionalities our stakeholders believe will enhance user experience or fill a gap in the market.
But it's not enough to just create a feature list. We understand the importance of feasibility. Hence, before we delve deep into the design process, our sales team consults with the RFP team to evaluate the feasibility of the proposed features. Once we have the green signal from the RFP, it's time to move on to one of the most crucial steps: the User Flow.
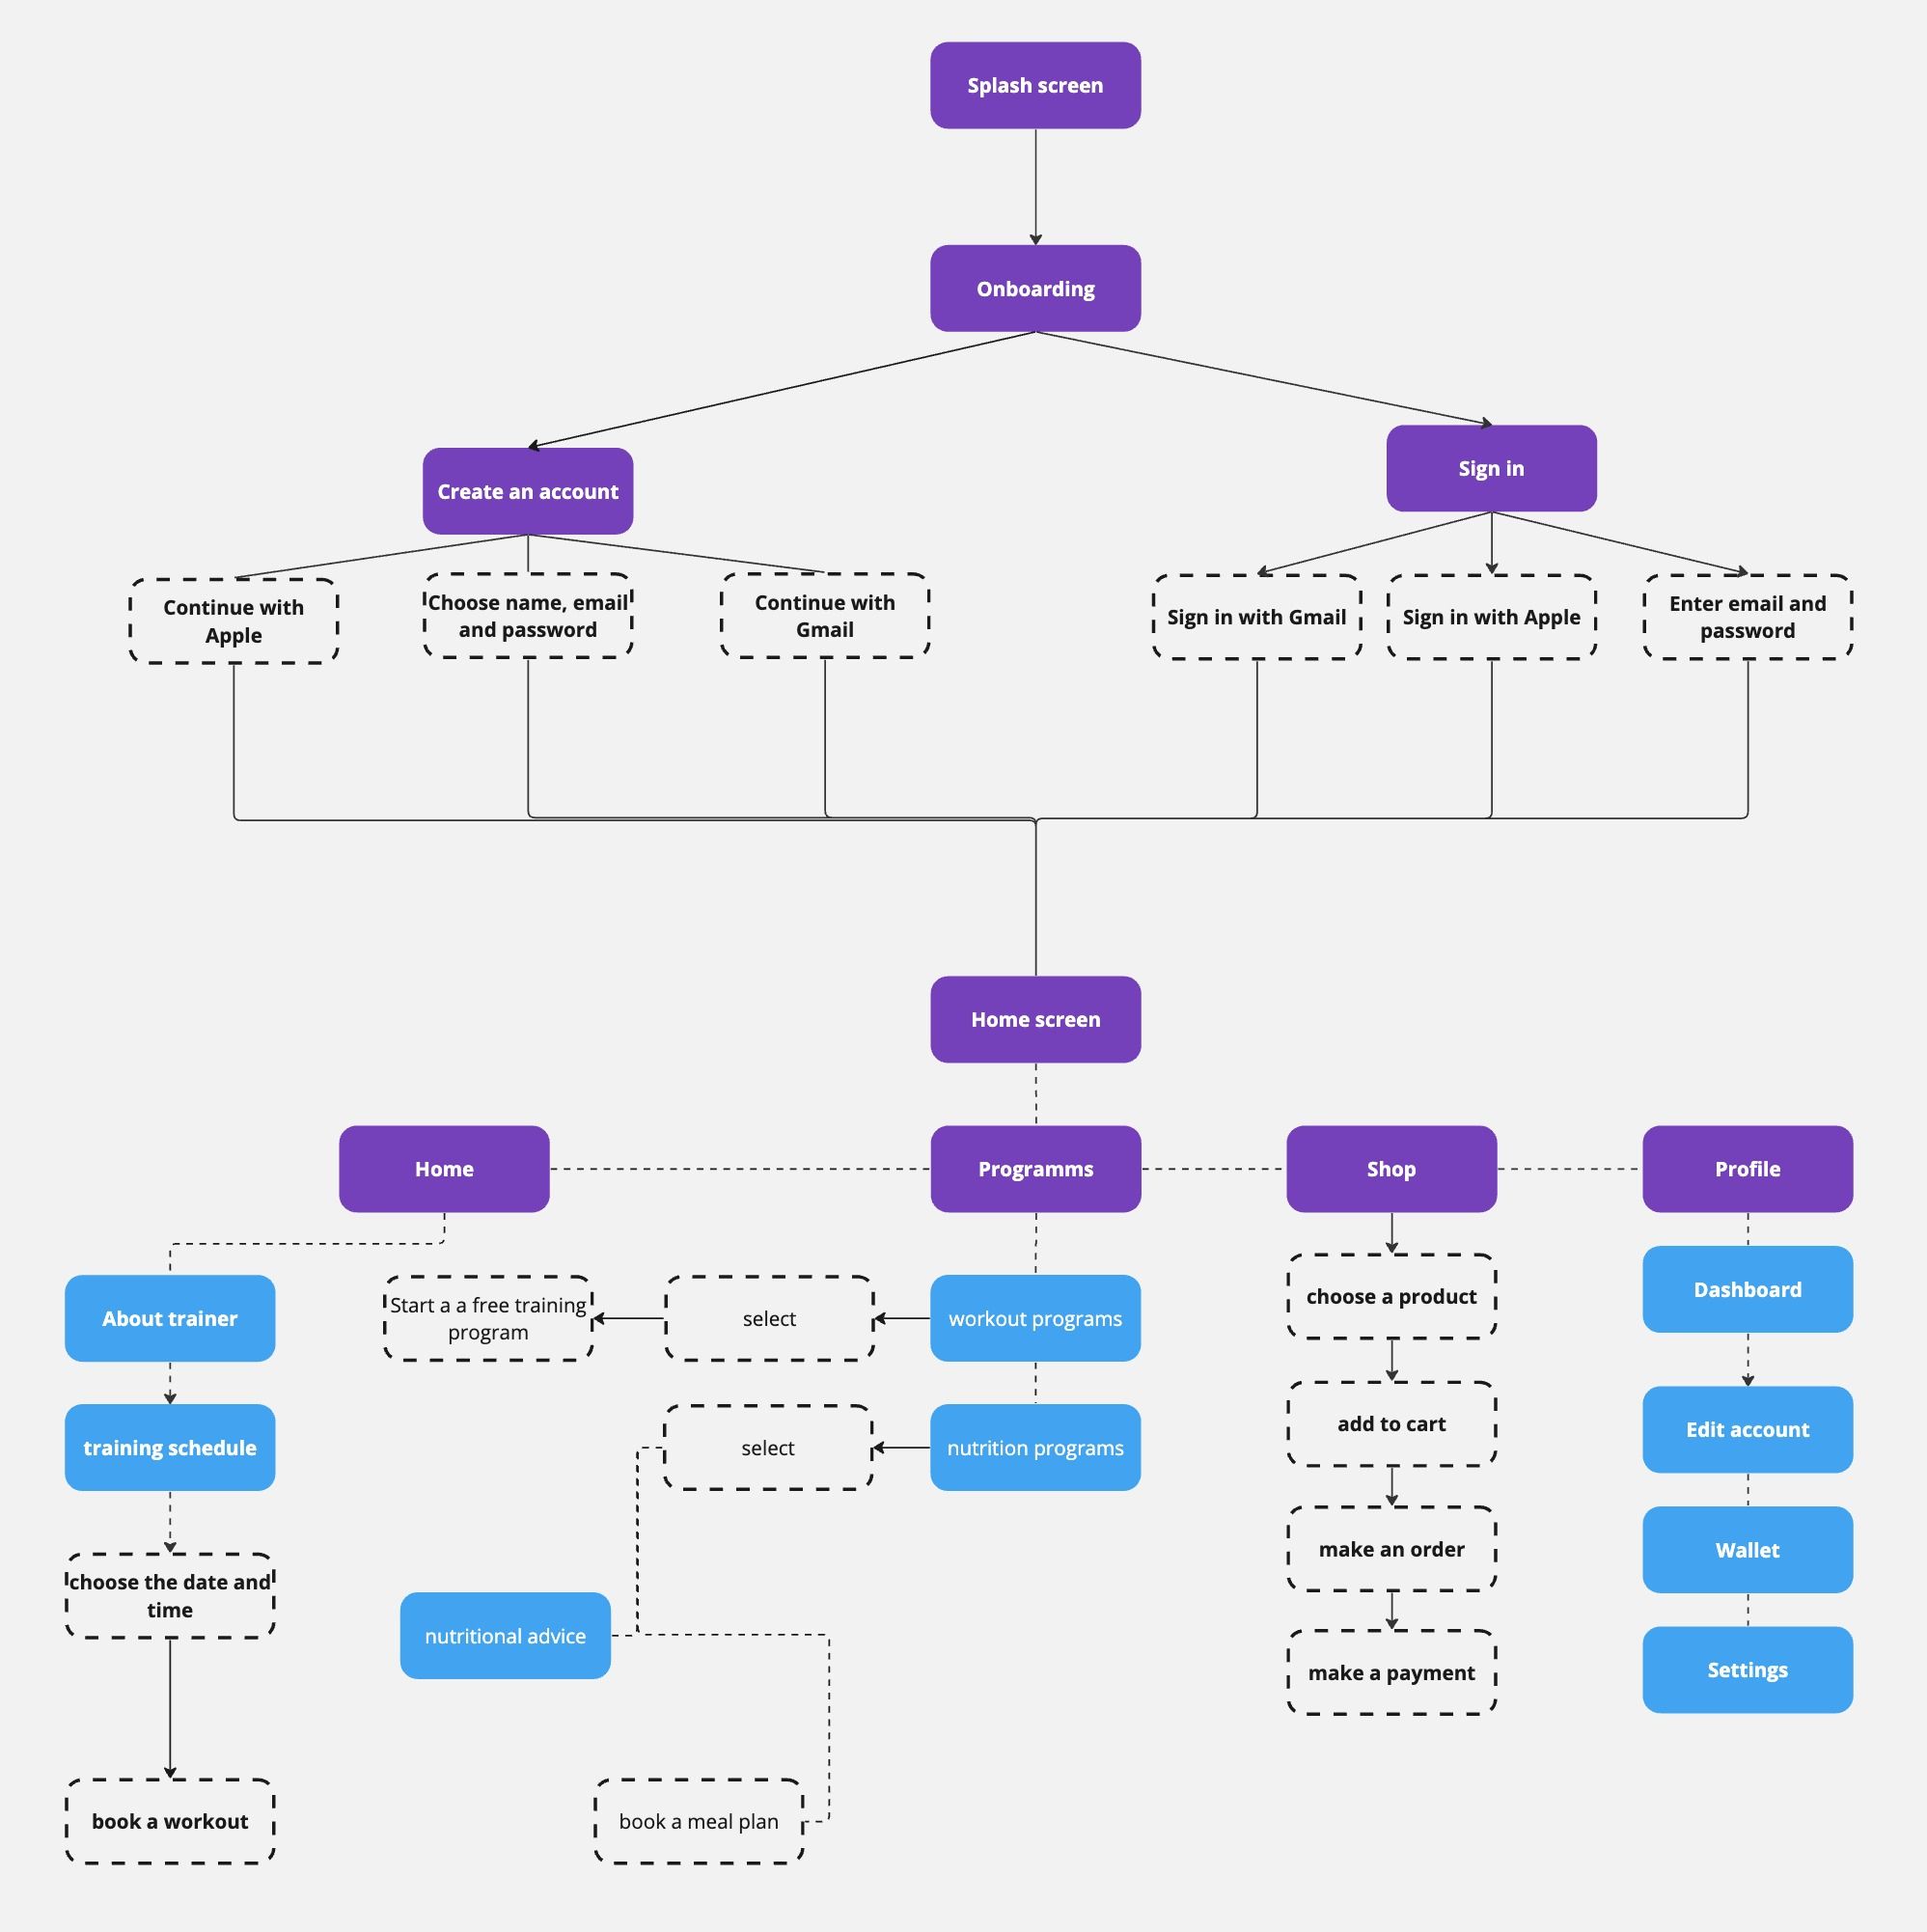
The user flow is essentially a visual representation of a user's journey through our product. It illustrates the path taken by users as they interact with the product, from their entry point, through various tasks, and till the endpoint. Understanding this flow helps us optimize the user experience by highlighting potential roadblocks, unnecessary steps, or confusing interfaces.
Creating the user flow involves:
1. Identifying Entry Points: These are the different ways a user might start interacting with our product. For a mobile app, this could be through a push notification, opening the app, or through deep links.
2. Mapping Out Key Tasks: We outline the primary actions the user wants to achieve. This might be setting up a profile, buying a product, or sharing content.
3. Defining End Points: Understanding how a user's journey concludes helps in making sure their goals are achieved, and they have a satisfactory experience.
4. Spotting Drop-Off Points: By analyzing where users might abandon the product or feel frustrated, we can pinpoint areas of improvement. Once the user flow is ready, it acts as a guide for our UI designers, content creators, and developers.
For a tangible example of how we implement user flow in our design process, let's take a look at the Blogfit application. Blogfit, a health and fitness blogging platform, came to us with a need to revamp their user experience. Based on the feature list we developed, we constructed a user flow that streamlined the process of creating, publishing, and sharing blogs.
User personas in UX research are essentially fictional characters created by designers and researchers to represent the different user types within a targeted demographic, attitude, and behavior set. These personas help in understanding users' needs, experiences, behaviors, and goals. Personas facilitate the creation of more intuitive and user-friendly journeys by focusing on the user's goals and pain points. They enable designers to create realistic scenarios to conceptualize how different users would navigate through the system, allowing them to optimize user-flows.
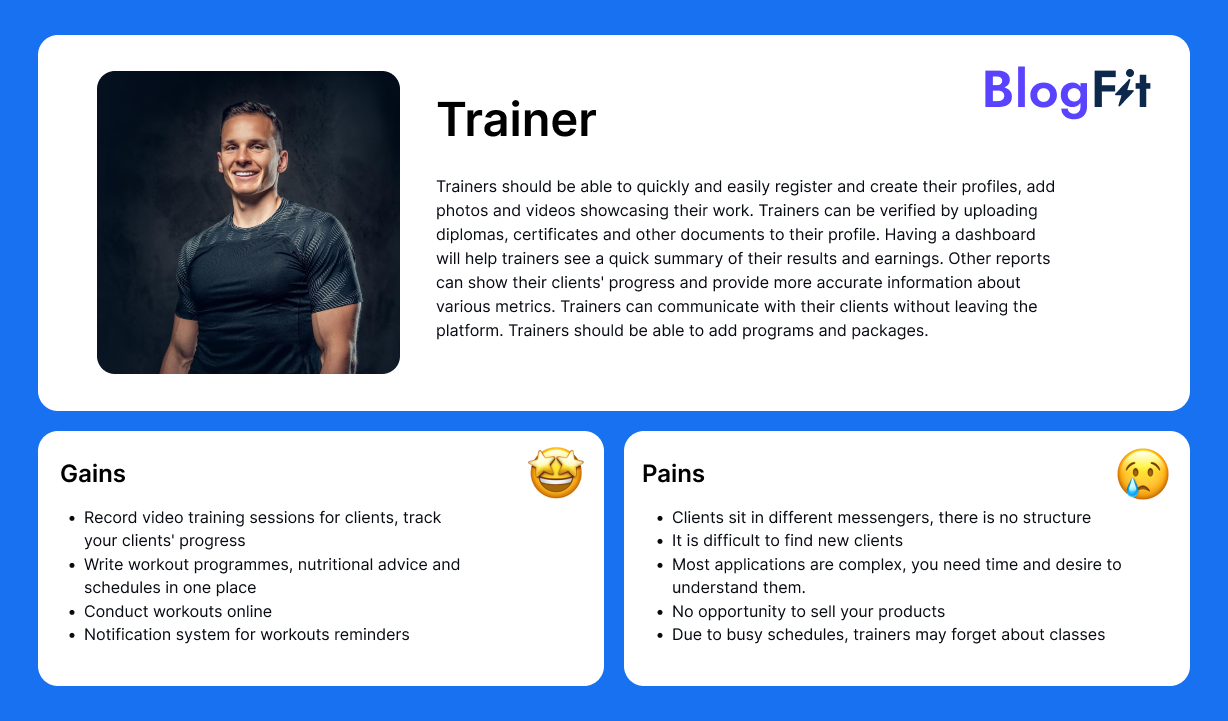
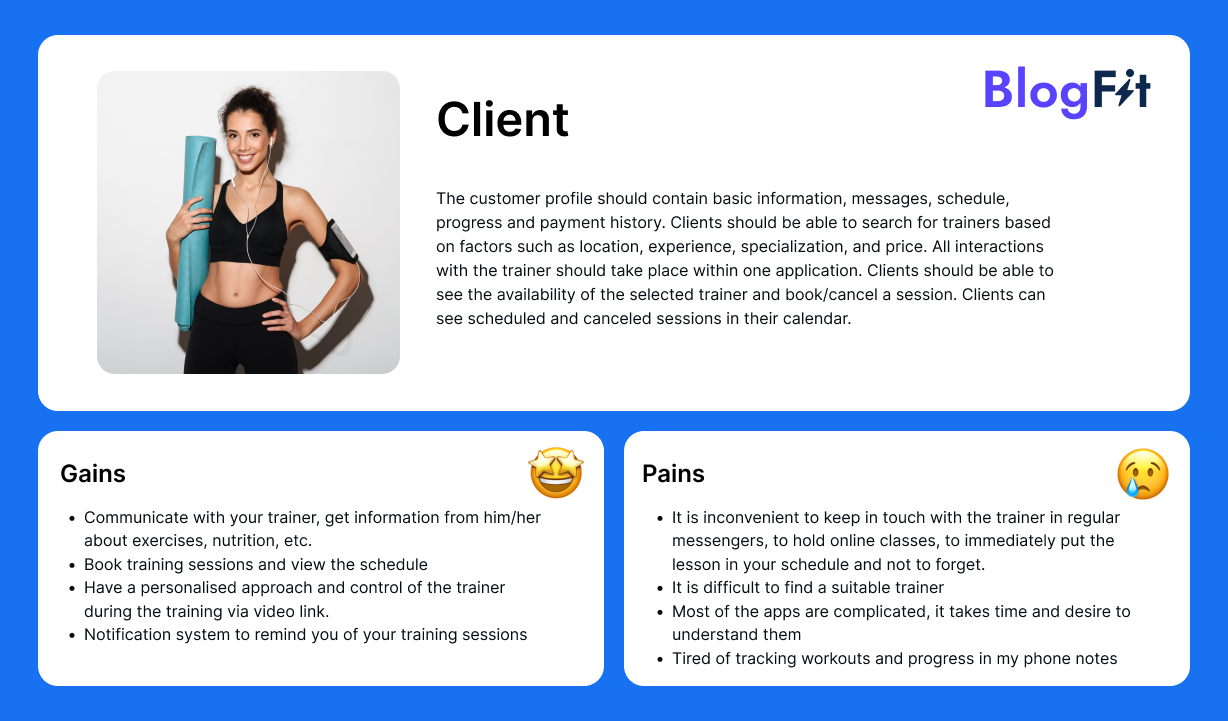
User Personas example
Approving Features and Outlining Contract
The approval of the User-flow involves a meticulous process where the document, once prepared by the designer, is sent to the client for a comprehensive review. During this stage, the client assesses the document and proposes any amendments to the Feature list. The team, in turn, revises and finalizes the document as per the client's inputs.
Once all modifications are accepted and the design is approved, the subsequent step is the signing of the contract, principally managed by the business developer. Clients are informed in advance about the contract-signing phase to maintain transparency. Typically, our collaborations follow the Time and Material model; however, for projects with a clear scope, a Fixed Price model may be presented separately for Wireframes and detailed design. Following the contract signing, the development of Wireframes is initiated.
Sketching Wireframes
After the contract is inked, the journey of wireframing begins, a pivotal step in crafting the visual skeleton of the digital product. Wireframes, in essence, are the blueprints or rough sketches of the digital product, displaying a low-fidelity visual representation of the interface, allowing for a depiction of the layout, element placement, and rudimentary functionality. They set the stage for how different components and screens will be orchestrated and interact with each other.
Our designers delve deep into the client’s requirements and visions, sketching basic structures and layouts that serve as the foundational framework for the application or website. The process is marked by simplicity and clarity, utilizing basic shapes and placeholders to represent elements such as buttons, images, text, and navigation menus, allowing the focus to be maintained on overall structure and flow without entanglement in detailed design elements.
This procedure is inherently collaborative, involving the client at each stage, just as in the User-flow. Iterations and refinements are driven by client feedback and user testing results, ensuring a seamless and coherent user experience, and resolving any potential design discrepancies early on.
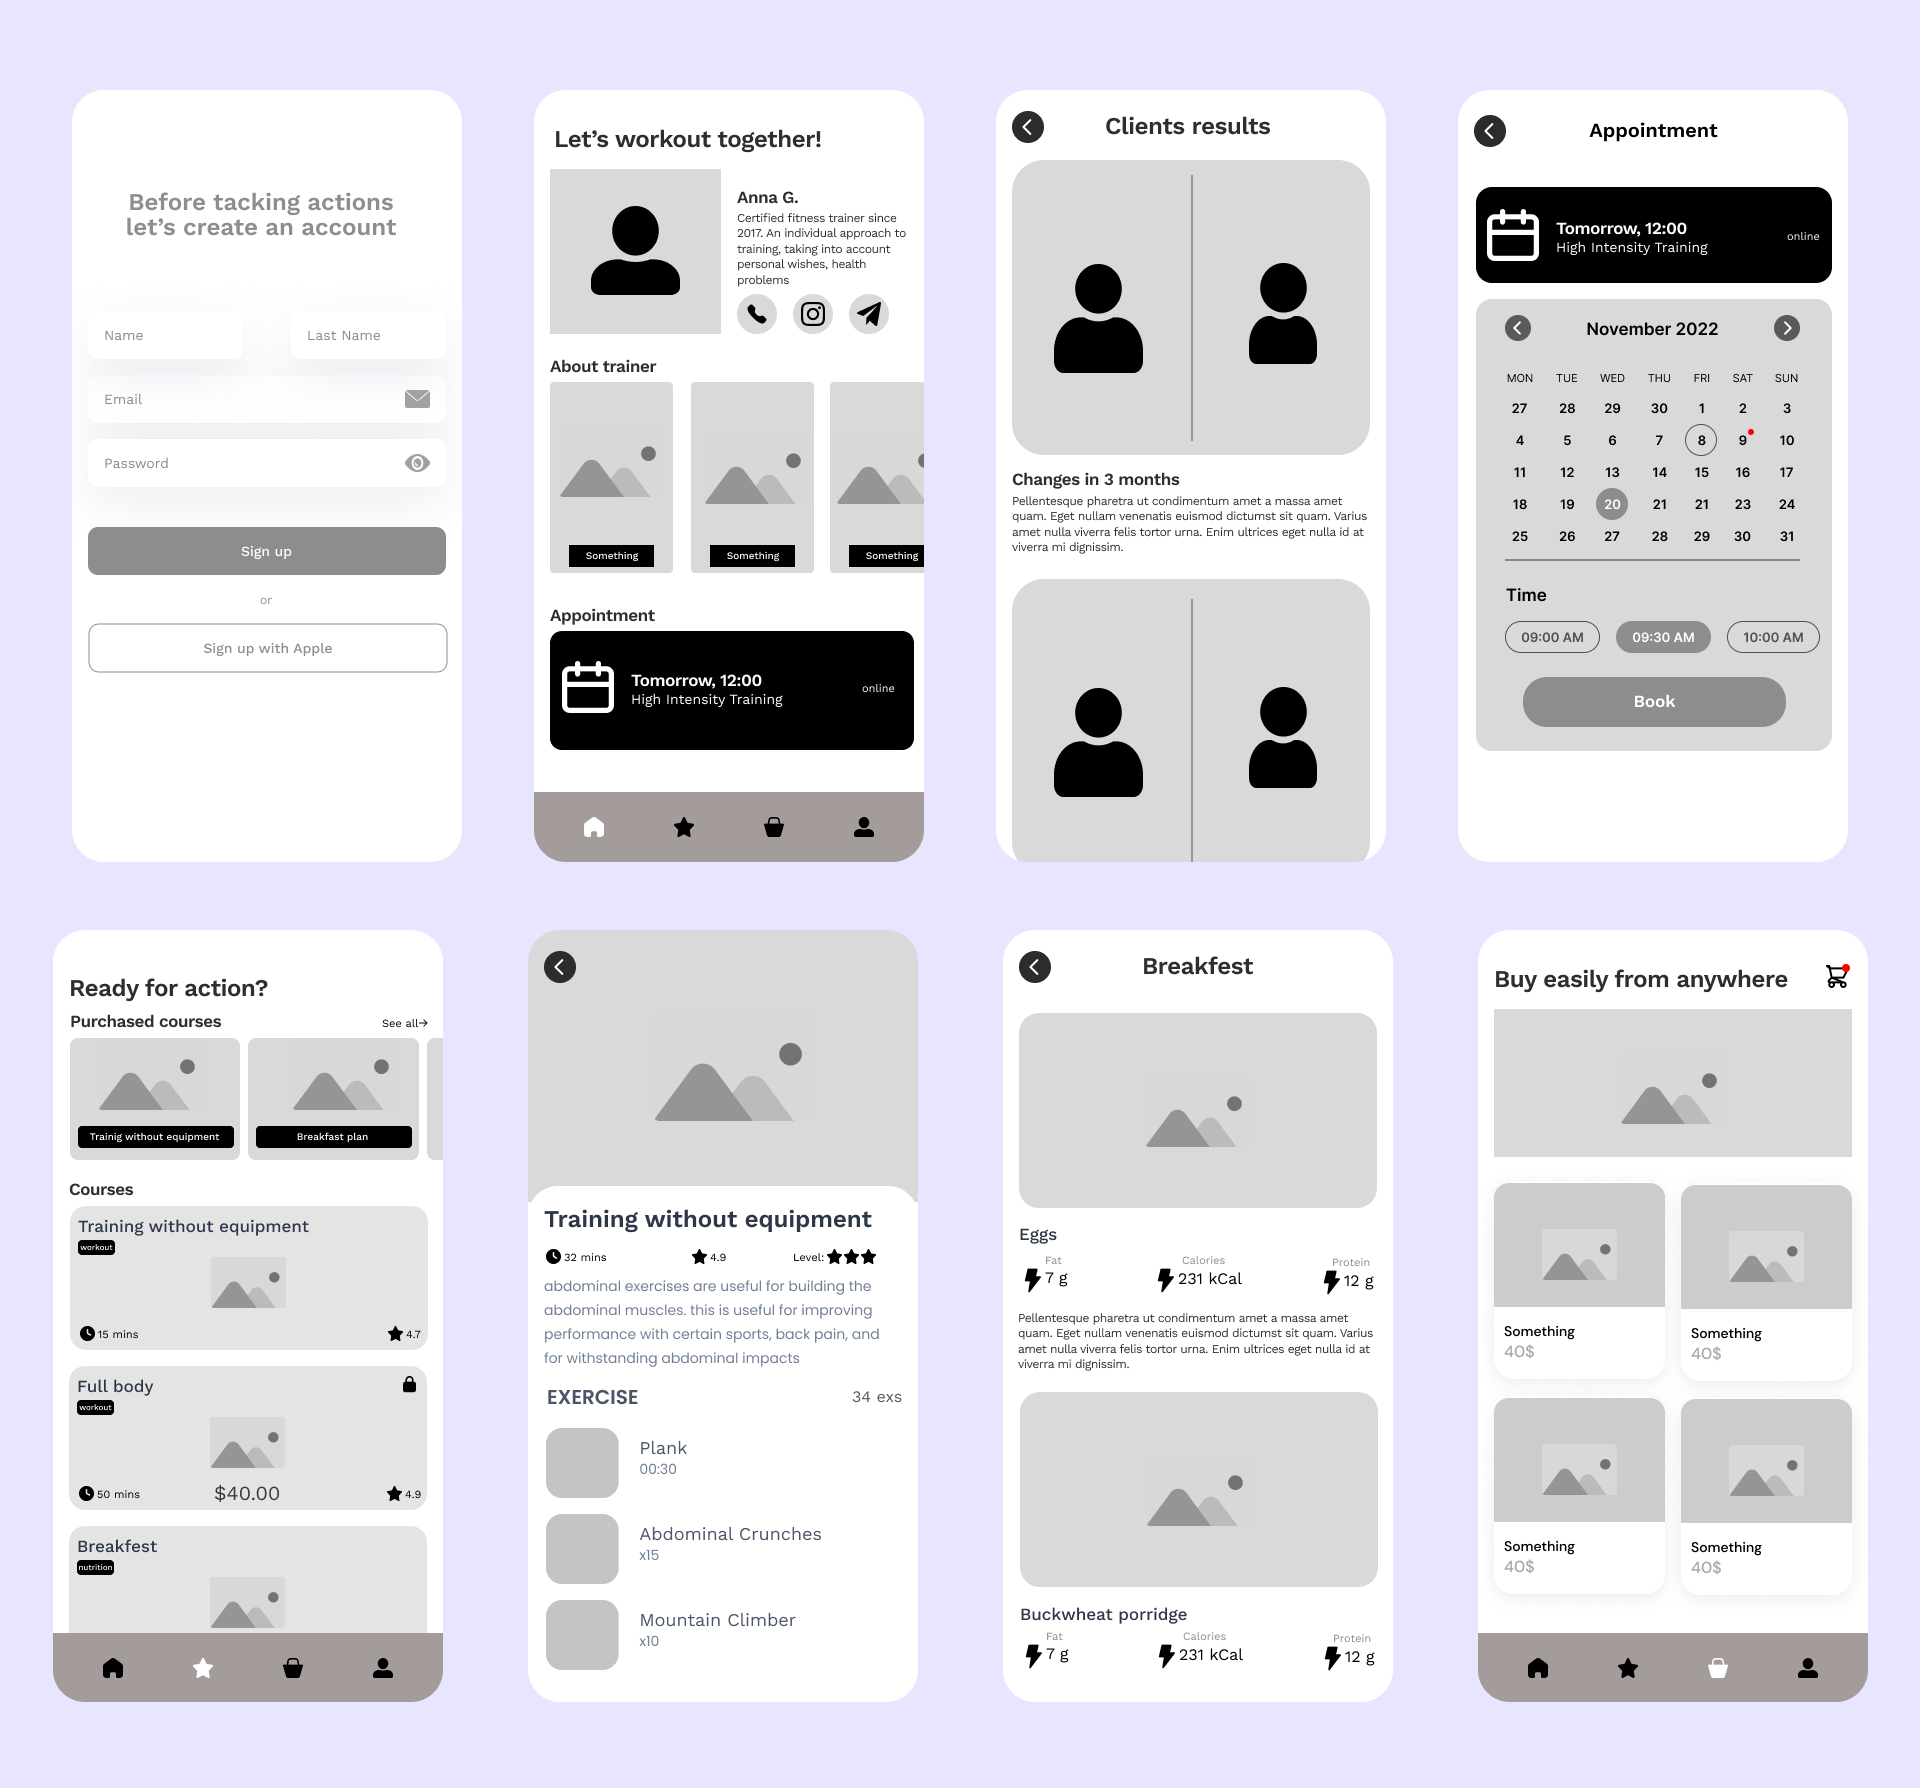
Transparent and ongoing communication is paramount, and our clients are encouraged to actively participate, providing their invaluable feedback and insights. Our utilization of cutting-edge collaboration tools facilitates real-time sharing and feedback collection on wireframes, ensuring swift and seamless revisions.
Wireframing is not merely a step in our design process; it is an opportunity to test, validate, and iterate on the structural design before diving into the detailed visual and developmental phases, ensuring the optimal utilization of time and resources and a smooth user experience. It lays the foundational stone, enabling the visualization of the final product, ensuring the harmonious interaction of all components, and aligning the design outcome closely with client expectations and user needs.
Visual Styling and Iterative Mockup Development
During this pivotal phase of our design process, the objective is to infuse life into the design by incorporating visual elements that elevate the appeal and engagement levels of the digital product. The focus is predominantly on synthesizing a harmonious and visually arresting UI design that not only mirrors the brand’s essence but also creates a resonant experience for the users.
Our designers, with meticulous attention to detail, work on color palette and typography that align with the brand and invoke the desired emotional response, ensuring a unified and refined appearance.
In the selection of icons and images, priority is given to intuitive and universally recognizable designs, complemented by relevant, high-quality imagery that enriches user experience and harmonizes with the content. This is critical for maintaining visual consistency and establishing familiarity across the digital product.
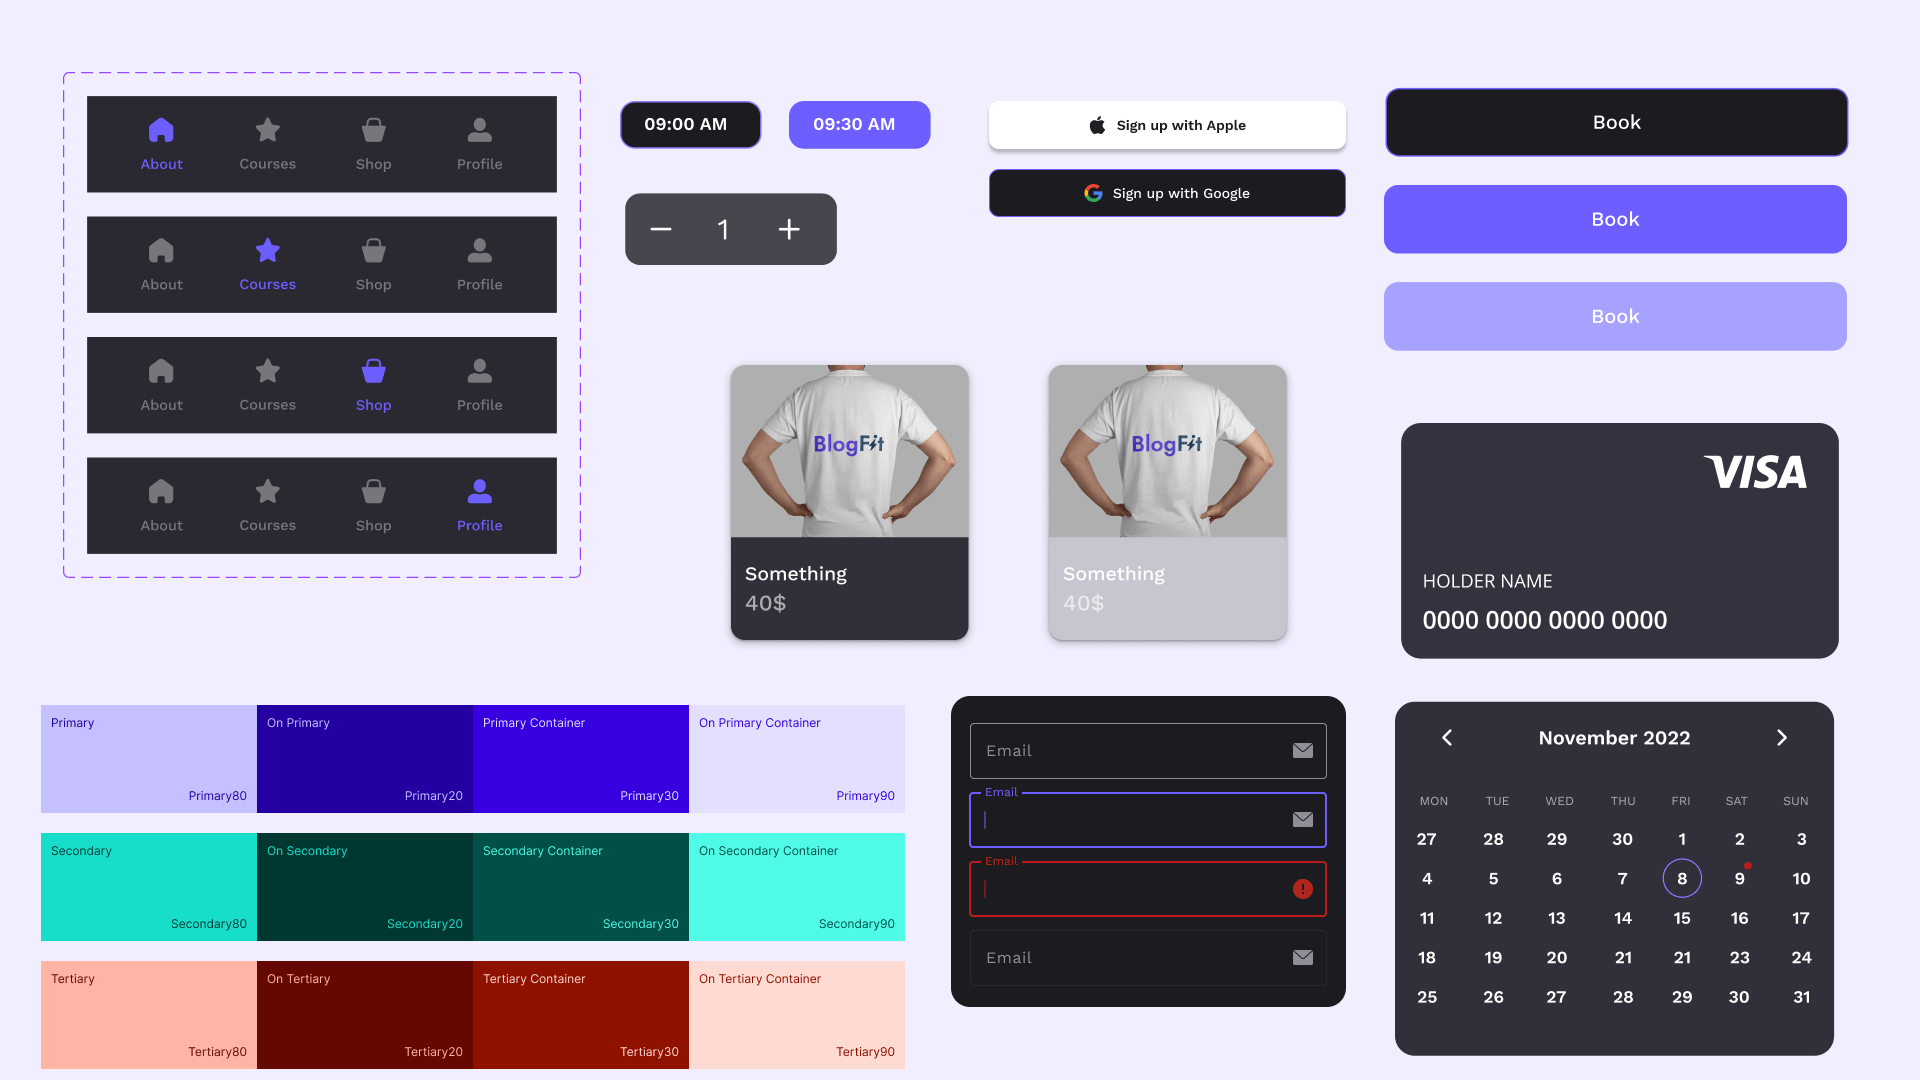
Accessibility is a guiding principle in this stage, with designs ensuring proper color contrast, text legibility, and providing alternative text for images to cater to users with various accessibility needs, making our design inclusive and user-friendly. Every visual element is optimized for different devices, guaranteeing a responsive and adaptive design.
Balancing aesthetics with usability, our design process ensures that the visual elements are not just mere adornments but integral components that amplify the overall user experience.
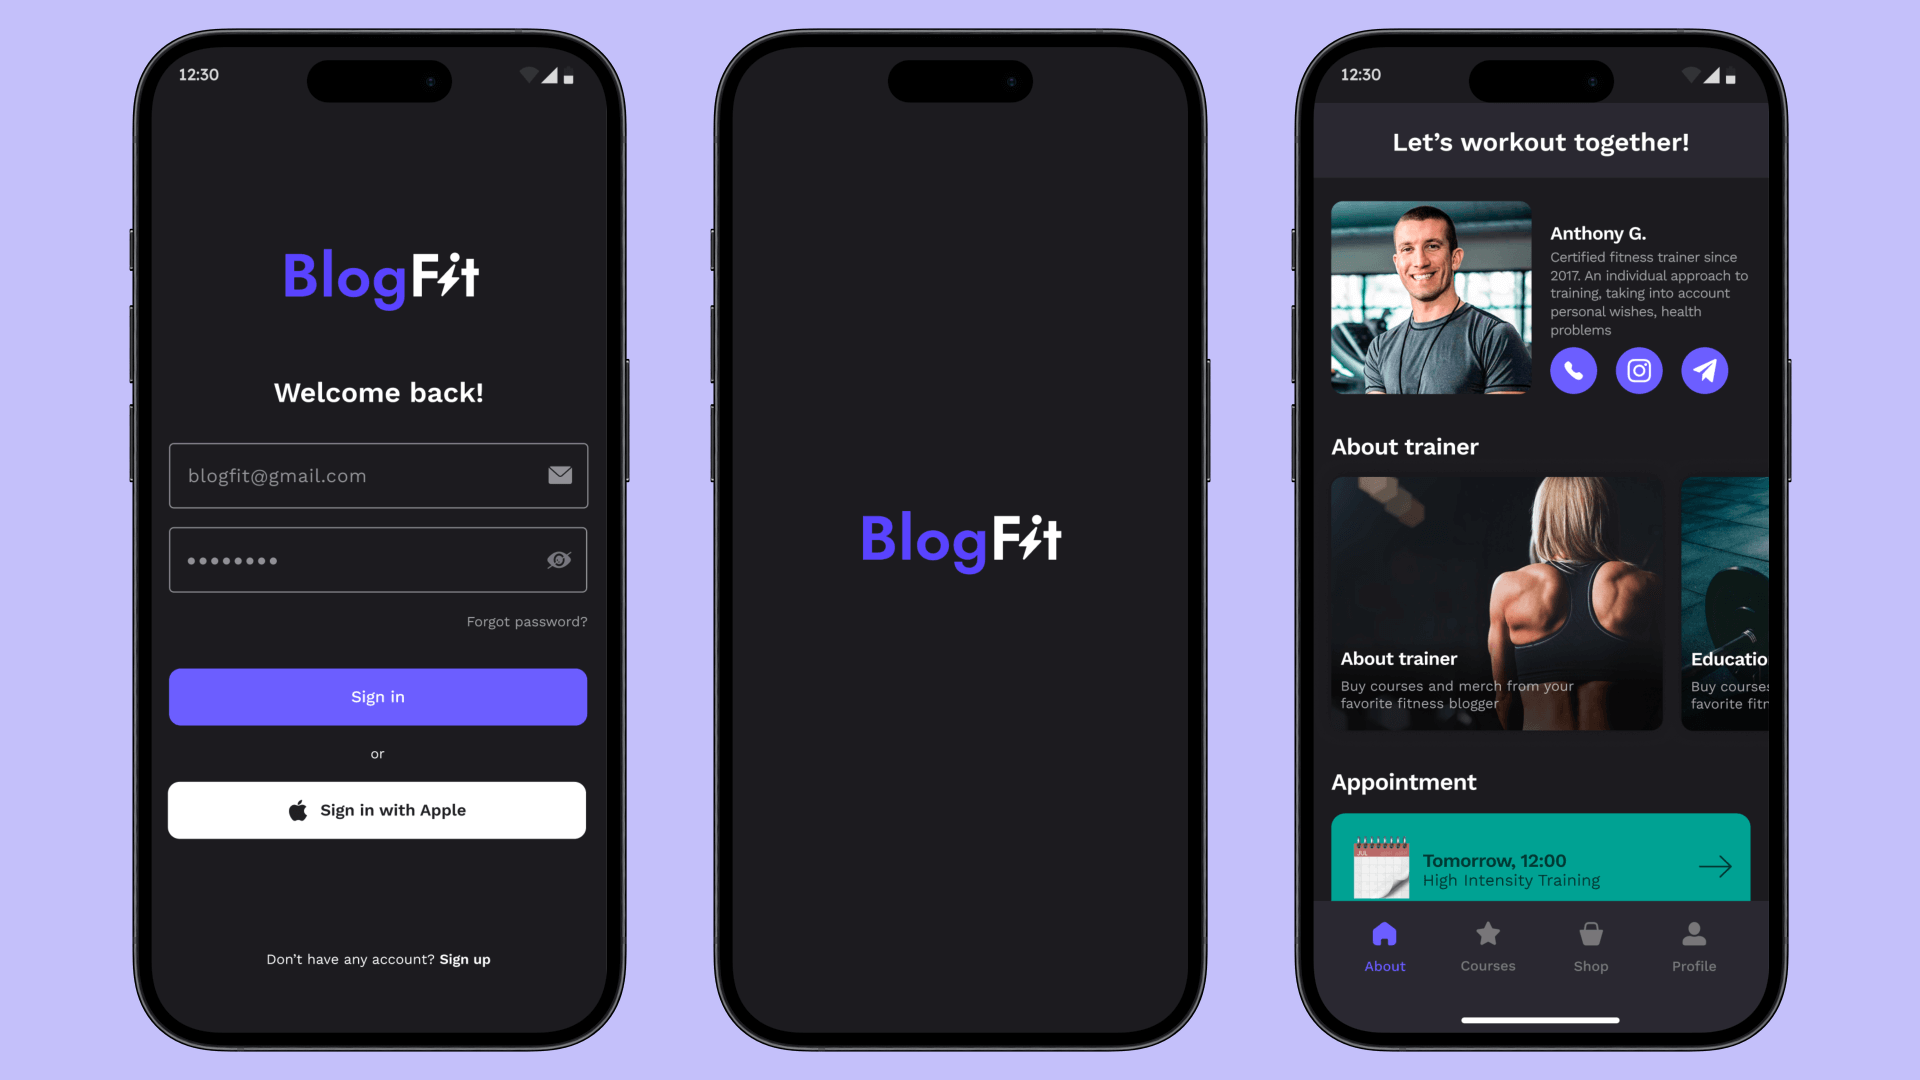
Once a consensus on the style is achieved with the client, we transition into the mockup creation phase. This stage is crucial as it brings a closer, more refined visualization of the final product, allowing the client to interact with the static, high-fidelity representation of the design.
This iterative approach ensures that the client remains integral to the refining process, enabling them to provide immediate feedback and request adjustments on a smaller scale, thus preventing overwhelming revisions at later stages. It fosters enhanced communication, clear understanding, and swift incorporation of client’s insights and preferences, ensuring each screen is fine-tuned to perfection before proceeding to the next.
This strategic and collaborative approach to mockup creation reflects our commitment to precision, client satisfaction, and design excellence. It's about harmonizing the intricate dance between aesthetics and functionality, where each step is a careful orchestration of elements, a symphony of visuals and interactions, fine-tuned to resonate with the brand’s essence and the user’s journey, crafting experiences that are not only visually delightful but also intuitively seamless and user-centric.
Interactive Prototyping
Once all the mockups are finalized, our designers meticulously transform them into a clickable prototype, enabling the client to experience an interactive version of the project. Such a prototype serves as an invaluable tool to present the project to teams, investors, and other stakeholders. It's a complimentary service we provide, enhancing the client's ability to visualize and interact with their project before it reaches the development phase.
Handing Over and Implementing Solutions
When the design journey reaches its final stage, the designer takes meticulous steps to prepare the project for a seamless transition to the development team, involving creating the necessary cuts and making variations on screens, among other crucial tasks.
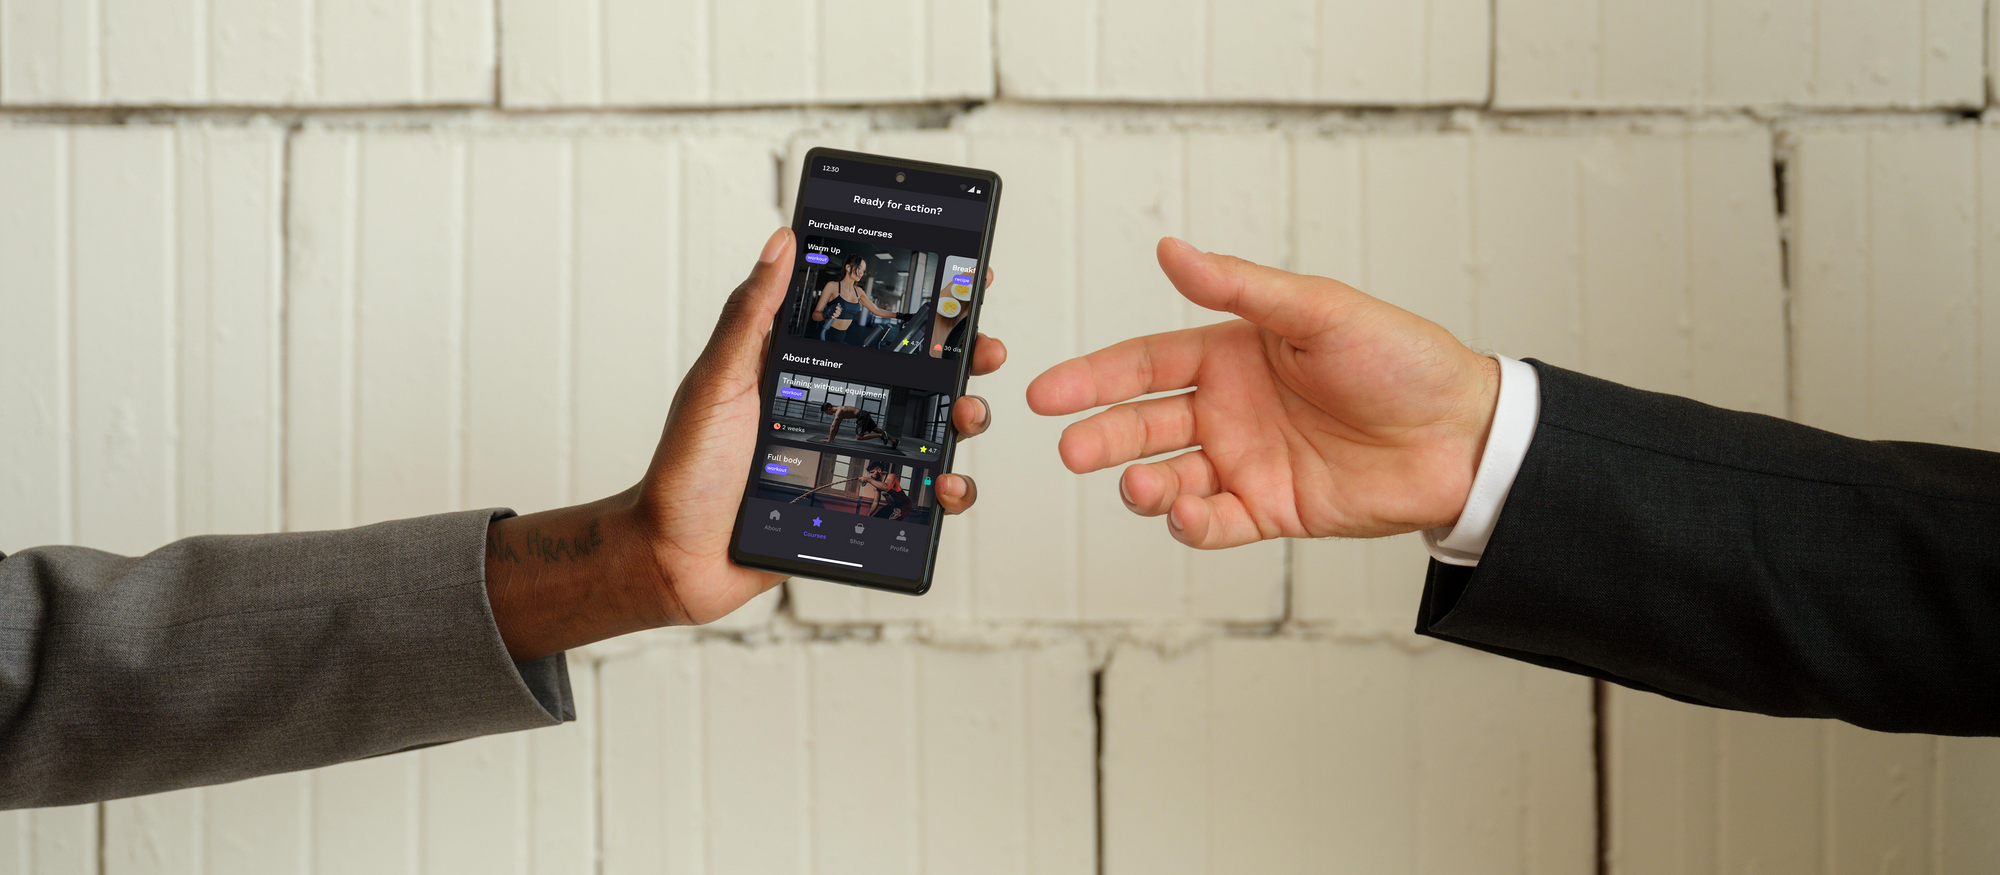
Having undergone meticulous usability testing and iterative refinement, it's now time to bring the validated design to life, a stage where the carefully articulated user experience begins to materialize. This transition is not merely a handover but a continuation of the collaborative spirit, requiring close interaction between designers and developers to ensure the precise and effective implementation of the design.
The designer provides the development team with all the required design assets, specifications, and documentation, serving as a comprehensive guide to facilitate their work. This ensures that the intricate details of the design and user experience are faithfully reproduced in the developed product, maintaining the integrity of the design vision.
Throughout the development phase, the involvement of the designer remains paramount, with regular reviews being conducted to ensure that the evolving product stays true to the original vision and meets user requirements effectively. It is crucial to test the product's functionality and interactions rigorously to confirm their alignment with the intended design and to ensure the user experience is as envisioned, smooth, and intuitive.
For those keen on a deeper understanding of this phase, especially related to mobile apps, refer to our comprehensive article ''Mobile App Development Process: Full Guide''
However, the journey doesn't conclude with the development and implementation phase. Post-launch, it is vital to persist in gathering user feedback and insights. Continuous collection of user data and feedback is instrumental in identifying potential areas for improvement and influences subsequent design refinements. This approach guarantees that the user experience is continually optimized, resonating with the evolving needs and expectations of the users, maintaining a balance between innovation and user-centric design.
Conclusion
The article outlines What the Flutter's meticulous and comprehensive approach to mobile app design, focusing on detailed and collaborative processes from the conceptual stage to the implementation of solutions. Each phase, from initial client conversations, wireframing, visual styling, iterative mockup development, to interactive prototyping and final handover, is characterized by a high level of transparency, precision, and attention to detail. These phases are crucial in ensuring that the end product is not only visually captivating and intuitive but also aligns with brand essence and user needs.
The process ensures ongoing, active participation from clients, enhancing communication and mutual understanding, and allowing swift and seamless revisions. Post-launch, the continuous gathering of user feedback and iterative refinements are crucial for optimizing user experience, maintaining a balance between innovation and user-centric design. In summary, What the Flutter’s design approach is a harmonious orchestration aimed at crafting experiences that are visually delightful and user-centric, resonating with both the brand and the user’s journey.

